Day View
Day view provides a focused, detailed display of a single day in your calendar, perfect for managing your daily schedule and appointments.
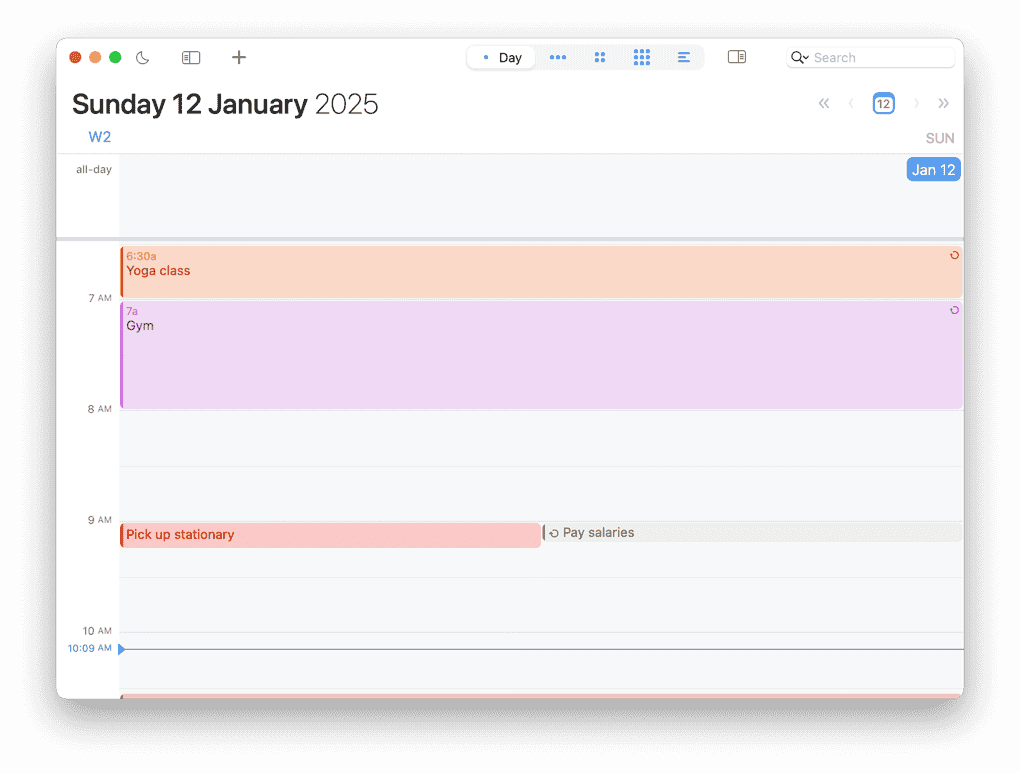
Day View Calendar is ideal for focusing on a single day's schedule with granular detail. To effortlessly navigate within the current day, simply scroll up or down to reveal earlier or later time slots.
To seamlessly scroll backward or forward one day at a time, click the navigation arrow buttons, swipe horizontally with two fingers on a trackpad, perform a single-finger swipe with a Magic Mouse, or use the keyboard shortcuts ⌘-Left-Arrow or ⌘-Right-Arrow. For a complete list of navigation shortcuts, see Day & Week View Navigation Shortcuts.
All-Day Section
all-day section, all day section, allday tasks todos to-dos, banner events, all-day events, dated tasks, all day sorting, holiday events allday, all-day area, banner area, task display, event banner, full day events
The all-day section prominently appears at the top of both Day and Week views, elegantly displaying all-day banner events including holidays, birthdays, and other full-day occasions.
What appears in the all-day section:
- All-day banner events (holidays, birthdays, travel days, etc.)
- Dated tasks (when Show dated Tasks is enabled in Task Settings)
- Multi-day events that span across dates
Task ordering in the all-day section: Tasks displayed here maintain the same order as configured in your Task List panel. This means:
- Tasks sorted by priority will appear by priority in the all-day section
- Manually ordered tasks will retain their custom arrangement
- Tasks sorted by due date will follow chronological order
If tasks in the all-day section appear in an unexpected order (not matching priority or due date), they may have been manually reordered previously. You can reset the manual task ordering to restore automatic sorting.
Displaying Multiple Time Zones
multiple time zones day week view, time zone display calendar, second time zone, third time zone
BusyCal allows you to display up to three time zones simultaneously in the time ruler (the vertical time bar on the left side of Day and Week views), making international scheduling and collaboration effortless.
Enabling Additional Time Zones
To display multiple time zones in Day and Week views:
- Navigate to BusyCal > Settings > Time Zones
- Enable Show second time zone in Day and Week views to display a second time zone
- Optionally enable Show third time zone in Day and Week views for a third time zone
- Select your desired time zones from the dropdown menus
Once enabled, the additional time zones appear as separate columns in the time ruler, each clearly labeled with the time zone abbreviation.
Also see Favorite Time Zones for more details.
Changing Number of Hours Viewed
BusyCal allows you to customize how many hours are displayed in Day and Week views, ranging from 4 to 24 hours.
Changing Hours from Settings
- Open BusyCal > Settings > General.
- Locate the Day and Week views show option.
- Select the desired number of hours from the drop-down menu.
Adjusting Hours Directly in the Calendar View
You can also dynamically change the visible hours while using Day or Week view:
- Option + Scroll – Hold
Optionand scroll up/down anywhere to zoom in/out. - Timeline Scroll – Hover over the left-side time ruler and scroll:
- Scroll up to zoom in (show fewer hours).
- Scroll down to zoom out (show more hours).
- Click + Drag – Click and drag on the left-side time ruler to manually adjust the hours displayed.
If you find yourself accidentally triggering the zoom feature when scrolling over the timeline, you can disable this behavior in Preferences > Accessibility by checking "Disable timeline scroll zoom in Day & Week views". When enabled, scrolling over the timeline will no longer adjust the visible hours.
adjust hours, day view, week view, zoom calendar, customize calendar view, change visible hours, time range, scroll to zoom, option key zoom, timeline scroll, adjust timeline, time ruler, change hours displayed, BusyCal day view, BusyCal week view, calendar zoom, drag to adjust hours, dynamic calendar view, change time scale
Day and Week views independently remember your preferred number of visible hours
You can also change various display styles in Appearance Settings.
Show Working Hours Only
working hours, day view, week view, hide non-working hours, toggle working hours, smart filters, calendar zoom, time blocking, business hours, schedule view, show working hours only, limit day view start of day end of day, full day hours not visible, all hours not showing
While you have full control over zoom levels in Day & Week views, sometimes you may want to focus only on your working hours and hide the rest.
Use the Working Hours toggle button in the toolbar (next to the date switcher) to quickly collapse hours outside your Day Start and Day End settings.
Even better, this setting is remembered when using Smart Filters, allowing you to switch between views seamlessly while automatically toggling working hours on or off based on your saved preferences.
When working hours are hidden, BusyCal shows a subtle overlay reminder so you always know you’re in a focused-hours view.
Changing Event / Task Times
You can efficiently select multiple events and drag them to adjust their start times. By default, BusyCal intelligently snaps to 15-minute intervals for quick scheduling. For more precise time adjustments, simply hold down the SHIFT key while dragging to enable minute-by-minute precision.
When you resize an event by dragging its top or bottom edge, BusyCal shows a live tooltip with the event’s resulting duration, making it easier to fine-tune start/end times.
While dragging events, BusyCal also shows a live time offset (for example +2h or -3d) so you can see exactly how far you’re moving an item.
Creating Overlapping / Adjacent Events
In Day & Week View, you can effortlessly create overlapping or adjacent events without disturbing existing schedules.
Simply hold down the ⌘ (Command) + ⌥ (Option) keys together, then click and drag anywhere on an existing event.
This powerful feature allows you to strategically place new events alongside existing ones without affecting the original timing.
Creating Events In Between
BusyCal makes intelligent scheduling effortless by allowing you to CTRL+Click (right-click) anywhere between two events to
instantly create a perfectly-fitted new event in the available time slot. No need to manually calculate or adjust times—just click, create, and continue with your day!
BusyCal also provides intelligent scheduling options when creating or editing events in week view through the context menu:
- Match Start to Previous End — Seamlessly align your event to begin when the previous one ends
- Match End to Next Start — Perfectly time your event to end when the next one begins
- Create Event Matching End of Previous — Generate a new event starting exactly when the previous concludes
- Create Event Between — Intelligently fill gaps between existing events
- Create Event After Selection — Add a new event immediately following your selected time
Calendar Selection via Natural Language
When Natural Language Processing is enabled, you can specify which calendar to use when creating an event by typing a slash followed by the calendar name.
For example, when creating a new event by double-clicking or dragging on the Day View, you can type:
Lunch with Joe /work
This will create the event "Lunch with Joe" on your "Work" calendar. You can use just the first few unique letters of the calendar name (e.g., /w). This feature shares the same settings as Month View's natural language processing.
Free / Busy Times
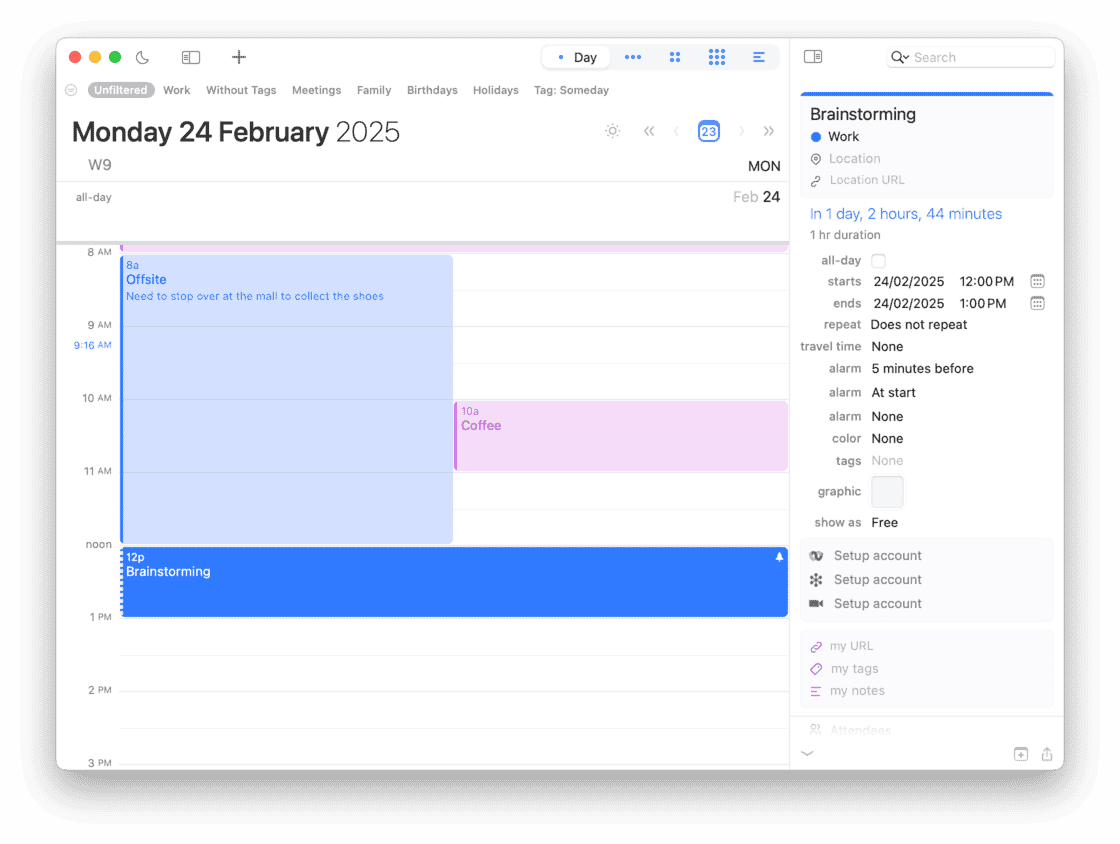
Timed events marked as Show as: Free (i.e., not marked as Busy in the Info Panel) are visually distinguished with a dashed colored border, while events that block your availability display with solid colors (the standard default behavior).
In shared calendars or calendars that publicize your availability for meeting scheduling, Free/Busy status is absolutely crucial. Events marked as Busy effectively prevent others from scheduling conflicting appointments, while events marked as Free clearly signal your availability for additional commitments.
Understanding Free vs. Busy Events
- Free Events: Indicate that you remain available and can accommodate additional meetings or multi-task.
- Busy Events: Definitively mark you as unavailable, preventing others from scheduling over those time slots.
By default:
- All-day events (banners) are automatically set to Free, as they typically represent informational items that don't block your availability.
- Timed events (with specific start and end times) are automatically set to Busy, effectively blocking your calendar for that duration.
If you're genuinely unavailable for an entire day due to an All-Day event (e.g., Out of Office, Travel Day), you can manually mark it as Busy to block scheduling.
Example Busy All-Day Event
📅 All-Day Event:
- Title: Traveling
- Time: All Day
- Show As: Busy (blocks availability for the entire day)
Example Busy Timed-Event
⏰ Timed Event:
- Title: "Doctor's Appointment"
- Time: 2:00 PM - 3:30 PM
- Show As: Busy (Solid color, blocks availability)
Example Free Timed-Event
⏰ Timed Event:
- Title: "Brainstorming"
- Time: 12:00 PM - 1:30 PM
- Show As: Free (Dashed color, does not block availability)
Use Free and Busy statuses to accurately reflect your availability and avoid unnecessary scheduling conflicts.
Customizing Day View Appearance
customize day view appearance, day view colors, day view fonts, day view style, personalize day view, day view customization options, change day view look, day view themes, day view display settings, modify day view appearance, day view visual settings
Personalize how Day View displays your events:
Event Display Options
- Event Text Color - Choose between black text or calendar/tag colors via Appearance Settings
- Show Notes - Display event notes directly in Day View
- Show event times for single-line events - Toggle this in Accessibility Settings to show or hide times for single-line items
- Word Wrap - Toggle word wrapping with
Shift-⌘-Wfor longer event titles - Rich Text/Plain Text - Switch display mode with
Shift-⌘-H
Visual Indicators
- Free/Busy Status - Free events show with dashed borders, busy events with solid colors
- Travel Time - Blocked travel time appears as a separate time block before events
- Task Duration - Tasks can display with visual duration blocks in the timeline
Grid and Layout
- Gridline Darkness - Enable darker gridlines for better visibility in Accessibility Settings
- Disable overlapping layout - Stack overlapping events vertically for a cleaner layout in Appearance Settings
- Time Format - Customize 12/24 hour display in General Settings
- Font Customization - Adjust fonts for events, dates, and notes
Keyboard Navigation in Day View
day view keyboard shortcuts, navigate day view keyboard, day view hotkeys, keyboard navigation day view, arrow keys day view, tab navigation day view, keyboard efficiency day view, day view keyboard commands, navigate without mouse day view, keyboard only navigation
Efficiently navigate Day View using keyboard shortcuts:
- Arrow Keys - Navigate between days in the calendar
- Tab/Shift-Tab - Select next/previous event or task
- ⌘-Option-→/← - Scroll forward/backward one day
- ⌘-→/← - Scroll forward/backward one week
- ⌘-T - Jump to today
- Double-click or ⌘-Return - Open Info Panel for selected event
- ⌘-D - Duplicate selected event
- **⌘-/ ** - Mark selected task as done/not done
- ⌘-⌥-click-drag - Create overlapping events
For the complete list of shortcuts, see Day & Week View Navigation Shortcuts.
Event Suggestions in Day View
day view suggestions, event templates day view, autocomplete events day view, reuse events day view, smart suggestions day view, past event templates, event history suggestions, quick event creation day view
BusyCal can suggest past and future events as templates while you create new events in Day View:
- Enable/Disable - Control suggestions via Settings > Suggestions > Show suggestions in Day View
- Quick Templates - Start typing an event title to see matching suggestions from your calendar history
- Smart Copying - Selected suggestions copy relevant properties like time, location, and alarms to your new event
- Customize Sources - Configure whether to search all calendars or only enabled ones in Settings
See Also
- Week View - Similar features in weekly calendar display
- Keyboard Shortcuts - Navigate Day View efficiently
- General Settings - Configure day start/end times and visible hours
- Time Zones - Display multiple time zones in Day View
- Smart Filters - Save custom Day View configurations
- Info Panel - Edit event details and set free/busy status