Backing Up and Restoring
BusyCal automatically backs up your calendars every 24 hours and saves your last 10 backups.
By default, BusyCal stores backups in the following directory:
~/Library/Containers/com.busymac.busycal3/Data/Documents/BusyCal Backups
To view this location manually, open Finder, click on the Go menu (from the top menu bar) and then on "Go To Folder". Copy and paste the path above and hit "Go".
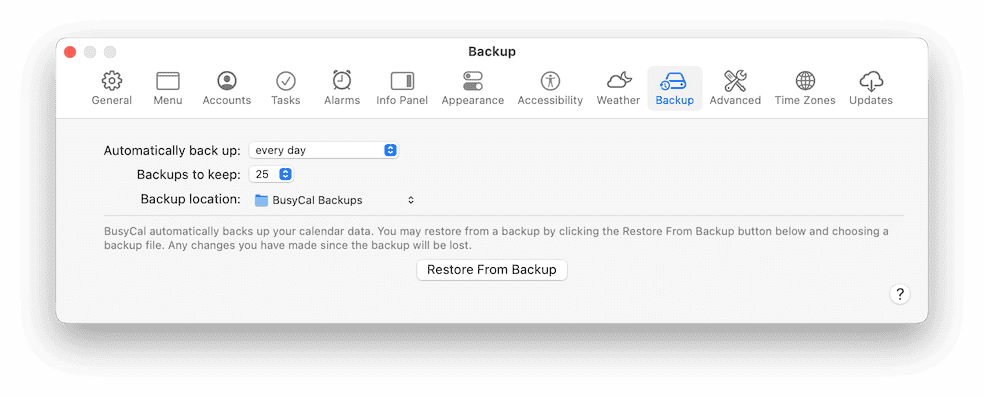
Automatic Backups
You can change the frequency, the number of backups to keep, and the location for the backup folder in BusyCal > Settings > Backup.
Your options are:
- Automatically back up — Controls how often backups are created.
- Backups to keep — Controls how many backup archives are kept when deleting old copies.
- Backup location — Controls the location where backups are stored. The default location is the BusyCal Backups folder in the Documents folder.
automatic calendar backups, calendar backup settings, automatic backup schedule, calendar data backup, scheduled backups, periodic calendar backups, backup frequency, backup configuration
Restore
If you need to restore your calendar from one of these backups, follow the steps below.
Restoring an Entire Calendar
- Go to File > Restore BusyCal.
- Select a backup file and click Open.
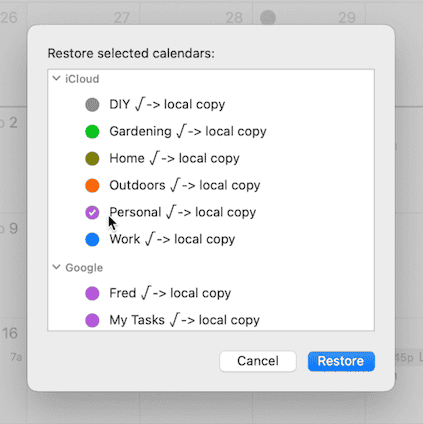
- A list of your calendars will be displayed. Check the calendars you want to restore.
- Click Restore to overwrite the current calendar contents with the backup.
Any events created or edited after the backup date will be lost when restoring an entire calendar. Consider restoring specific events when possible.
After clicking Restore, select the Restore as a "On My Mac" calendar only checkbox on the dialog presented next in order to restore it as a local On My Mac calendar.
This allows you to then drag and drop individual events you would like to restore from the restored calendar back to the account you wish to restore these to.
When this option is unchecked, all events on the calendar you restore are replaced with the contents of the backup. Therefore, if you restore from a backup that was created yesterday, any events created on the calendar you are restoring since yesterday are lost.
Restoring Specific Events
If you don’t want to overwrite your current calendar but need to recover specific events, follow these steps:
- Go to File > Restore From Backup.
- Select an older backup file and double-click to open.
- Choose the calendar containing the events you wish to recover, click Restore and then check the Restore as an 'On My Mac' Calendar option.
- This ensures the restored calendar remains local and does not override your cloud content.
- Locate the missing event(s) in the restored calendar and drag them to the desired calendar to move them across. You can also copy these events and paste them manually to any other calendar.
- Once you have restored the necessary event(s), delete the 'On My Mac' calendar.
By following these steps, you can recover lost events while ensuring your existing data remains intact. The video below demonstrates these steps.
restore single event, restore one event, restore individual event, restore specific event, recover one event, recover single event, restore just one event, restoring individual events, restore specific appointment, recover individual event, restore lost event, restore deleted event, restore specific calendar entry, recover one calendar event, restoring single events, selective calendar restoration
Backup and Restore Settings
Nearly all settings in BusyCal automatically sync between Macs over iCloud. There is no need to back up and restore settings. If you have just purchased a new Mac, simply sign in with your iCloud account, install BusyCal and your settings should automatically restore. You may, however, need to add your individual calendaring accounts (such as iCloud / Google / Outlook) to BusyCal in order to retrieve your calendars and events.